初探GitHub Actions: 实现VuePress自动化部署
背景
之前写了篇介绍用Travis CI自动化部署的,谁知。。。他竟然、竟然收费了😭, 静茹姐姐给我的勇气看了一眼费用, 没眼看, 我不配😥

已经陷入自动化部署温床的我, 立刻就去寻找替代品了, 今天试一下这个GitHub Actions吧~
GitHub Actions是什么
actions见名知意是一堆动作, 这一系列的动作包括了pull代码, 测试代码, 编译代码, 登陆服务器, 发布第三方服务等操作, GitHub把这些行为叫做actions
集成 GitHub Actions 部署到 GitHub Page
设置github
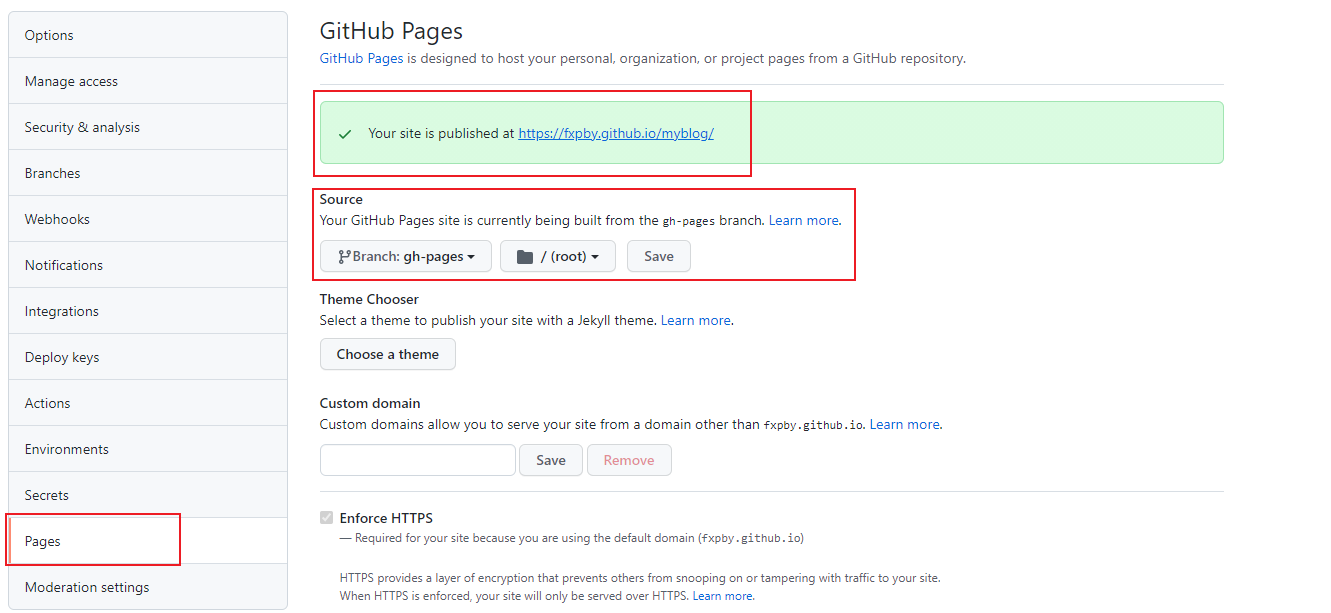
手动创建一个gh-pages分支
在Source中选择gh-pages分支,以后我们生成的静态文件存放在这里
创建github token
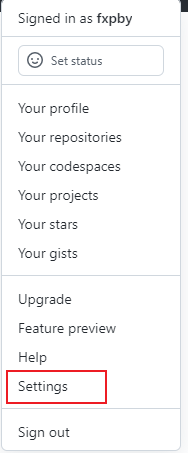
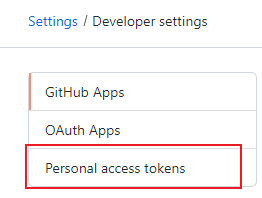
点击我们右上角的个人头像,点击Settings
来到Developer settings,点击Personal access tokens, 再点击Generate new token

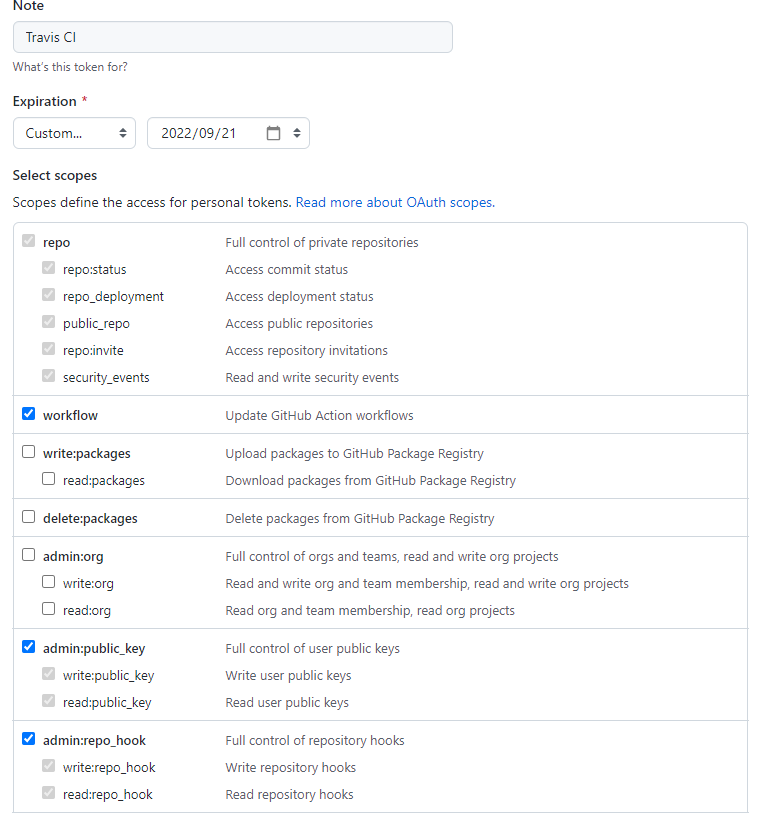
接下来选择权限, Note随便写,下面权限的话勾选如图所示,保存后会得到Personal access tokens一个token串,只展示一次,这个请妥善保存,以后如果想访问需要更新
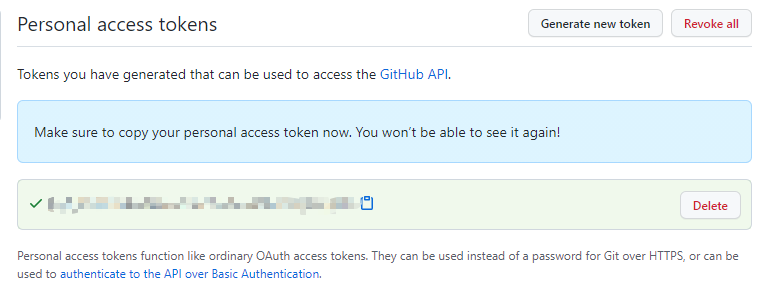
我们保存一下这个token, 一会儿要用
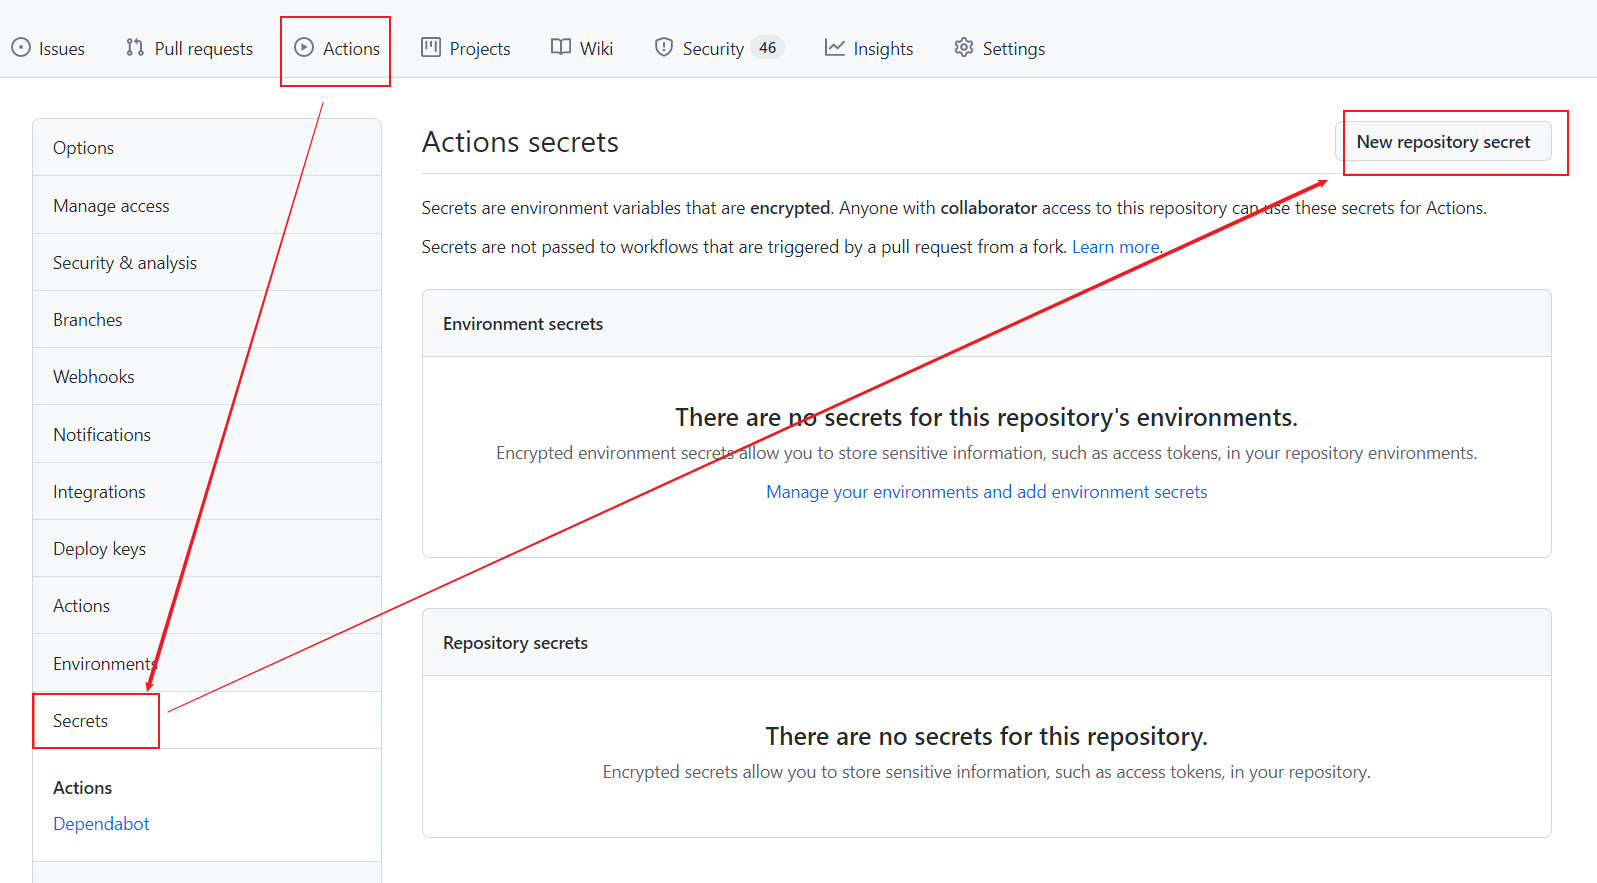
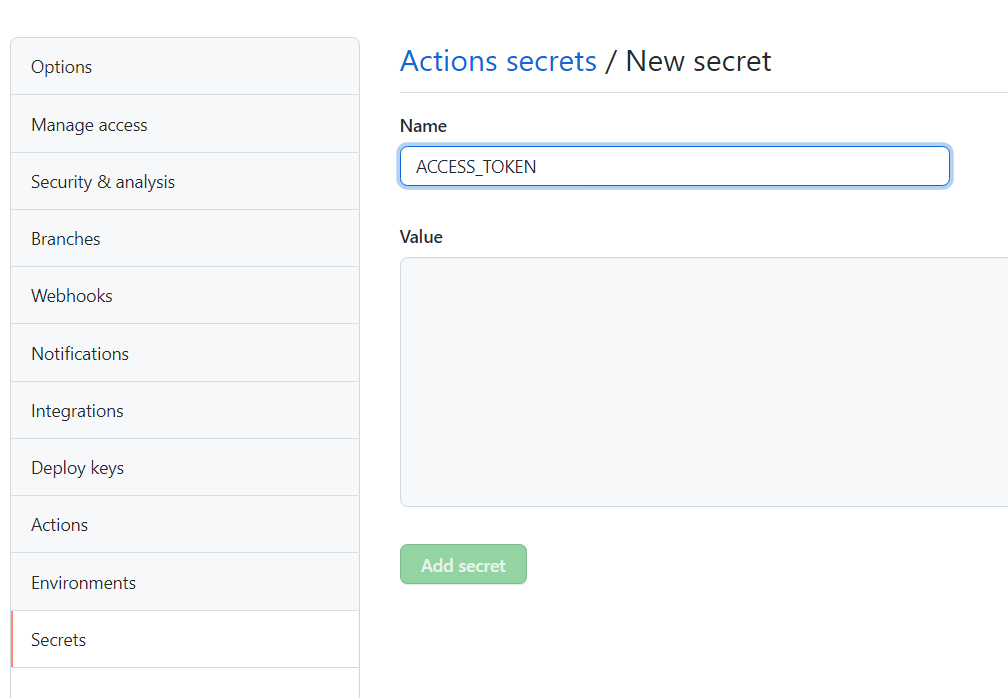
设置Actions secrets
name填写ACCESS_TOKEN, value填写刚才保存的token
创建xx.yml文件
项目中自己手动新建.yml 文件名随意起,github会自动运行workflows目录下所有的yml文件, 其中workflow中的一些配置比较重要:
name: workflow 的名称。如果省略该字段,默认为当前 workflow 的文件名
on: 触发workflow的条件, 比如push就是 git push 时触发这个workflow
jobs: 包含workflow要执行的任务
ci.yml全部配置如下
# This is a basic workflow to help you get started with Actions

name: CI

# Controls when the workflow will run
on:
  # Triggers the workflow on push or pull request events but only for the master branch
  push:
    branches: [master]
  pull_request:
    branches: [master]

  # Allows you to run this workflow manually from the Actions tab
  workflow_dispatch:

# A workflow run is made up of one or more jobs that can run sequentially or in parallel
jobs:
  # This workflow contains a single job called "build"
  build:
    # The type of runner that the job will run on
    runs-on: ubuntu-latest

    # Steps represent a sequence of tasks that will be executed as part of the job
    steps:
      # Checks-out your repository under $GITHUB_WORKSPACE, so your job can access it
      - name: Checkout 🐤
        uses: actions/checkout@v2

      # Runs a single command using the runners shell
      # - name: Install and Build 🎄
      # run: npm install && npm run docs:build

      # Runs a set of commands using the runners shell
      - name: Install and Build 🎄
        run: |
          npm install
          npm run docs:build

      - name: Deploy 🚀
        uses: JamesIves/github-pages-deploy-action@releases/v3
        with:
          ACCESS_TOKEN: ${{ secrets.ACCESS_TOKEN }}
          BRANCH: gh-pages
          FOLDER: docs/.vuepress/dist
action cache 配置
npm
# 缓存 npm node_modules
- name: Cache dependencies
  uses: actions/cache@v3
  with:
    path: ~/.npm
    key: ${{ runner.os }}-npm-cache-${{ hashFiles('**/package-lock.json') }}
    restore-keys: |
      ${{ runner.os }}-npm-cache-

# 安装依赖 npm
- name: Install dependencies
  # 如果没有命中缓存才执行 npm install
  if: steps.cache-deps.outputs.cache-hit != 'true'
  run: npm install
yarn
# 缓存 yarn node_modules
- name: Cache dependencies
  uses: actions/cache@v3
  id: yarn-cache
  with:
    path: |
      **/node_modules
    key: ${{ runner.os }}-yarn-${{ hashFiles('**/yarn.lock') }}
    restore-keys: |
      ${{ runner.os }}-yarn-

# 安装依赖 yarn
- name: Install dependencies
  # 如果没有命中缓存才执行 npm install
  if: steps.npm-cache.outputs.cache-hit != 'true'
  run: yarn --frozen-lockfile
集成 GitHub Actions 部署到阿里云
服务器购买流程和基础初始化配置这里就不啰嗦了 🦜域名购买备案和解析配置,nginx配置,https证书配置都不是本文的核心内容,这里就直入正题了🐎
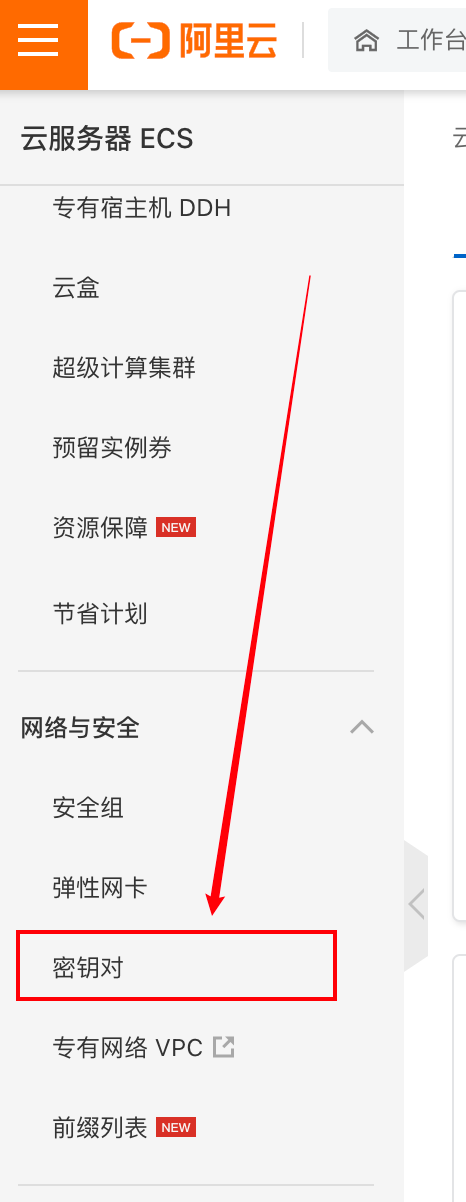
创建阿里云密钥对
进入控制台 - 云服务器 ECS - 左侧列表 - 网络与安全 - 找到密钥对
接下来我们创建 SSH 密钥对,然后绑定上 ECS 服务器, 并且将私钥下载保存好, 复制下来去GitHub用
name填写SERVER_SSH_KEY(随意), value填写刚才的私钥
创建配置.yml文件
name: Deploy to aliyun
on:
  #监听push操作
  push:
    branches:
      # master分支,你也可以改成其他分支
      - master
jobs:
  build:
    # runs-on 指定job任务运行所需要的虚拟机环境(必填字段)
    runs-on: ubuntu-latest
    steps:
      # 使用action库  actions/checkout获取源码
      - name: Checkout 🐤
        uses: actions/checkout@v2
      # 安装Node13
      - name: use Node.js 14.15.1 🐣
        # 使用action库  actions/setup-node安装node
        uses: actions/setup-node@v1
        with:
          node-version: '14.15.1'
      # 安装依赖
      - name: npm install 🐥
        run: npm install
      # 打包
      - name: npm build 🎄
        run: npm run docs:build
      # 部署到阿里云
      - name: Deploy to Aliyun 🚀
        uses: easingthemes/ssh-deploy@v2.1.5
        env:
          # 私钥
          SSH_PRIVATE_KEY: ${{ secrets.SERVER_SSH_KEY }}
          # scp参数
          ARGS: '-avzr --delete'
          # 源目录,编译后生成的文件目录
          SOURCE: '/docs/.vuepress/dist'
          # 服务器ip:换成你的服务器IP
          REMOTE_HOST: 'xxx.xxx.xxx.xxx'
          # 用户
          REMOTE_USER: 'root'
          # 目标地址 你在服务器上部署代码的地方
          TARGET: '/xxx/xxx/xxx'
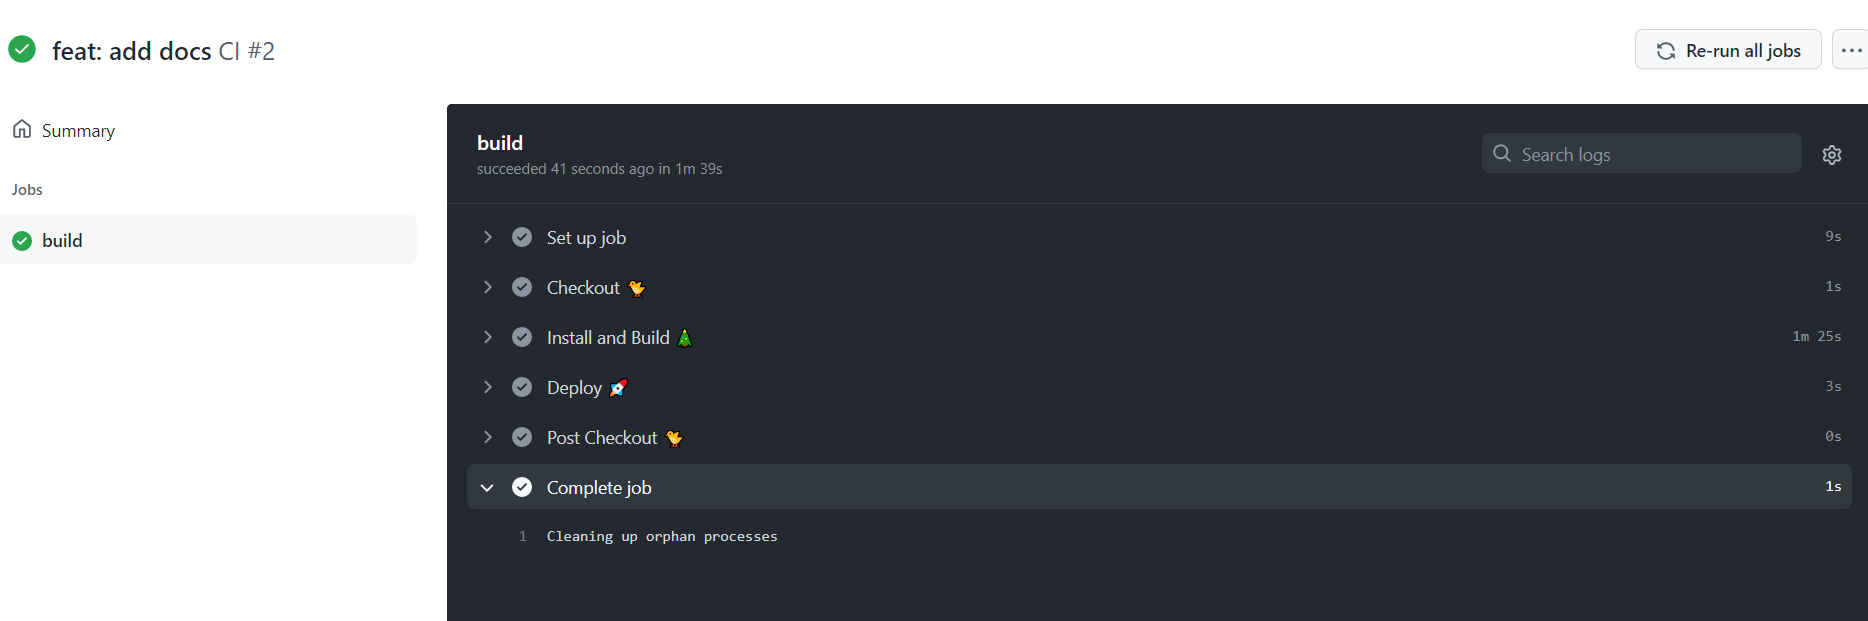
测试
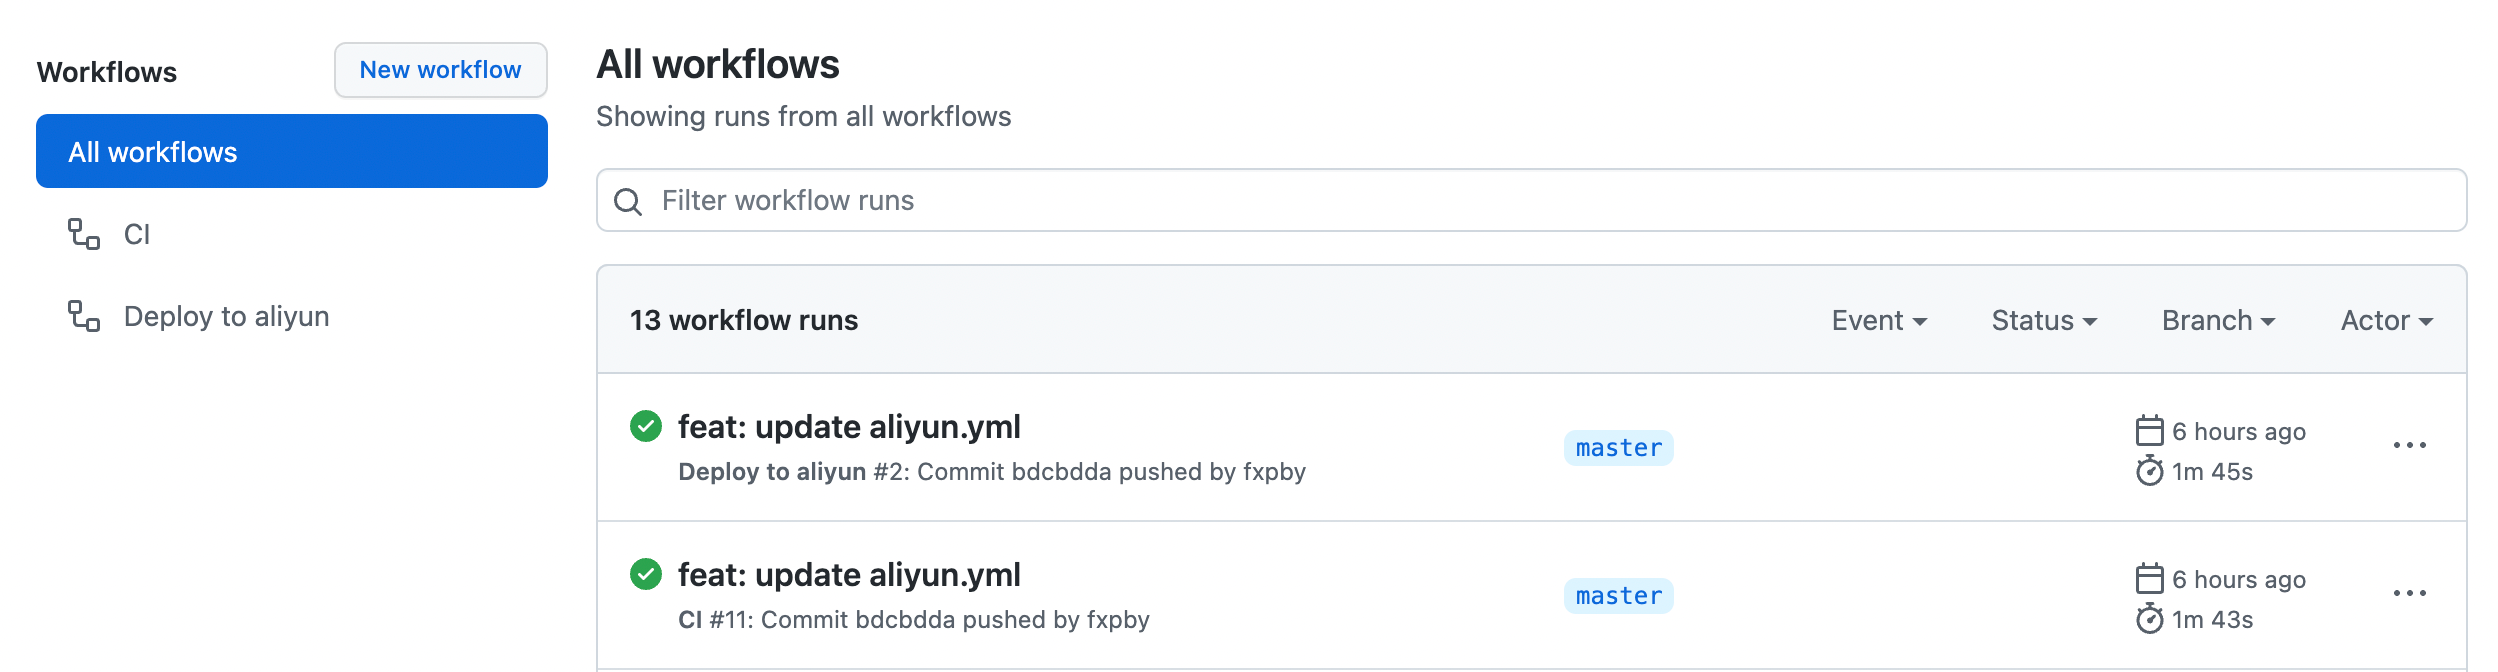
修改代码,push上去, 可以看到构建日志, 不到两分钟,也是很快的~